 This classroom idea begins with an exploration of multimedia or multimodal texts. Students then use multimedia technologies to make and share works, products and texts.
In the creation of all multimedia works, time is fundamental, both as a technical consideration to plan, create and refine the work as well as a story convention to decide how events are represented to either inform, persuade, entertain or educate an audience.
Students can
- explore production workflows in the technical construction of specific media forms
- analyse conceptual conventions related to how stories and information can be represented in multimedia or multimodal forms.
- explore questions such as:
- How are multimedia or multimodal works made?
- How are complex ideas conveyed in multimedia and multimodal forms?
A vast range of forms can be used to create multimedia or multimodal works. This work can be undertaken individually or in groups.
Click here to find out about media forms and multimedia products under the 'Multimedia in the Australian Curriculum' menu.
One place to start working in multimedia is to ‘reverse engineer’ an existing work. This requires students to unpack the technical and symbolic elements in a media form and identify the conventions and story principles used to combine them in the selected text.
All multimedia works have their own characteristics. However, they are all constructed from a common list of elements that use new and emerging conventions and are decoded by audiences to make meaning.
Multimedia can convey factual information to create emotional engagement. Students can identify the cognitive and emotional effects that a text has on audiences.
Task
Individually or in groups, students explore a scene or sequence from a multimedia work and discuss how it conveys meaning to an audience.
Some examples:
- the climactic resolution of a superhero film
- a ‘training montage’ from a sports film
- the introduction of a subject in a documentary
- a video game ‘boss’ level
- a ‘breaking news’ segment on television news.
Learning activities
The recipe of a scene
Individually or in a small group, students select or are assigned a multimedia or multimodal work and identify a characteristic scene.
Next, they reflect on the cognitive and emotional effects this scene has on an audience. They consider how the technical and symbolic elements contributed to these effects. These ‘ingredients’ will reflect the conventions and story principles used to convey meaning.
Themes, topics and inspiration
Some questions to ask at the start of this inquiry:
- when does this scene occur in the work?
- what is happening in the scene?
- what information is being conveyed?
- how might this scene make an audience feel
- how might the audience understand information communicated in this scene?
- why do you think the creators chose to make this scene in this way?
Once students have identified the effect of a particular scene and how it informs, persuades, entertains or educates an audience, they can begin to reverse engineer more details of the ‘recipe’ that led to this effect.
Some questions to ask students at the start of this inquiry:
- what is the camera showing us at each moment of the scene?

- at what angle, height and distance are we placed in relation to the things we see?
- what are the characters or subjects in the scene saying and/or doing?
- what symbolic elements are present in the scene?
- how are colours, costumes, props or locations used to represent other ideas?
- how have the smaller moments of time been edited together to create this scene?
- are rapid shots used to convey action or longer, slower shots used to build suspense or drama?
- has time been altered through slow or sped up motion?
- how is lighting used in the scene?
- is the lighting a noticeable colour? (artificial or natural, bright or dark)
- what feelings does the lighting convey to the audience?
- what sounds are used in the scene?
- are the sounds part of the storyline (dialogue or sound effect) or are they part of the narration or soundtrack?
- has any text been added to the scene to convey information (subtitles or location names)?
- if so, what fonts were used?
To present their ‘recipe’ (responses to these questions), students might
- deliver an oral report to a class, playing and pausing their selected scene to discuss specific details
- make a ‘video essay’ in which they narrate their analysis as an audio commentary over the top of the selected scene
- present their recipes (responses) on paper or as a digital slideshow.
 Now it’s time to give students an opportunity to test their recipes. Ask them to start by creating a scene that uses specific genre conventions from fictional or informative multimedia works. Students might like to try their hand at becoming the next Jane Campion or Michael Moore, a process that requires a lot of planning and coordination. Start small and work up.
Task 1
In groups, students work together to replicate a particular convention or story principle from a selected multimedia work. They plan, produce and present a short scene to demonstrate their understanding of technical and symbolic elements and the conventions used to combine them for a particular effect.
Sample genres might include:
- a sports documentary: replicating a key scene that depicts a player or team training for a big match
- a scene for a fictional feature length film: replicating a convention of a specific genre, for example a ‘jump scare’ from a thriller a scene from the film version of a class novel
- news broadcast: replicating the technical effects and conventions of weather report.
Learning activities
 Making a scene
Building on their analysis, students follow the recipe they devised and reverse engineer a scene to create a new one.
To do this, they work in groups to document a plan and process for making a short production which can be screened to an audience when completed.
Getting organised
Organisation of time is everything in a multimedia or multimodal production. Each member of the group is assigned specific duties. These can be roles like ‘director’ or ‘camera operator’ or roles such as ‘runner’, ‘opening titles designer’, ‘composer’ or ’floor manager’. Students can take on multiple roles across the stages of the production. For example, a director might oversee the draft of a short script, even though many people in the group will collaborate in its writing.
Once all the roles have been decided, the group can begin documenting their project, either digitally and/or on paper.
 Key stages of production and required resources
Planning, also called pre-production, is when the main concept is devised and turned into documentation that outlines what will be created. Key documents and decisions that should be made in this stage are: script, storyboard, wireframe, interview questions, casting, locations, sets, costumes and what technology (cameras, sound recorders, lights, computers) will be used to capture the story.
Production is when the group works together to film, record or make the various elements that will comprise the final product. Managing the equipment is crucial, as is the organisation of the digital files that are created. Keeping production calendars and diaries is a good idea, as is making sure there is someone in charge of the production timeline.
 Post-production is when all the elements are brought together and the choices about how particular conventions will be created are made. In this stage there are many cycles of editing, testing and refining sequences and combinations of image, video, text, sound and animation. Although one or two key editors might complete most of this work, the entire group still has an active role in reflection. Be aware that parts of this production may need to be re-shot or re-made and that this work can be done even as the product nears its final edit.
Distribution is where a product is exported, compiled or rendered into its final format that can be shared. Organise a screening of the final products to celebrate all the work. This can include final peer-reflection or audience feedback as a way of measuring the success of the intended cognitive and or emotional effect identified in the plan.
When you are ready to go into a longer multimedia project, one place to start is to look at how the narrative element of ‘time’ can be represented in a multimedia story. All stories are told over time. How events are selected and presented in a sequence influences the way an audience experiences the narrative.
 Task 2
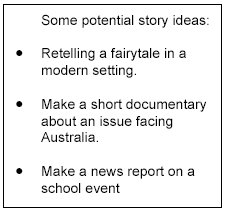
In small groups or individually, students devise an outline for a story or plan how they can tell a known story. For example, teachers might provide a subject for a documentary or a topic for a news report or segment from a class novel. Students discuss what details are important, and which could be left out. Next, they represent these selected moments in a storyboard, and then explore all the ways time can be manipulated in a multimedia product to tell the story.
Sample conventions of time in multimedia works might include:
- using montage to rapidly progress a sequence of events
- using slow motion to add emphasis to a single event
- using time-lapse to depict great cycles of change
- editing a series of shots together to construct a linear cause and effect sequence.
Using the roles from the Making time to replicate (above) project as well as the production timeline, each group plans a small multimedia work in response to a specific idea.
Life in a minute
Can you tell the story of a life in 60 seconds?
Task 3
Students work together to select a subject (person, place, object) from their community whose life story will be represented in one minute of time.

Resources, tips and how-tos
Scripting and Storyboarding an interview – ABC education
How to shoot a video interview – ABC education
Setting up equipment for a video interview – ABC education
Table 1: Links from the task to the Australian Curriculum:
|
Media Arts Achievement standard |
By the end of Year 6, students explain how ideas are communicated in artworks they make and to which they respond. They describe characteristics of artworks from different social, historical and cultural contexts that influence their art making. Students structure elements and processes of arts subjects to make artworks that communicate meaning. They work collaboratively to share artworks for audiences, demonstrating skills and techniques. |
||
|
Strands |
Making and responding by
|
||
|
Content descriptions |
|
||
|
Key concept/s |
|
||
|
Cross-curriculum priorities
|
|
General capabilities
|
|
INCLUDING ALL STUDENTS
Access and participation can be enhanced by:
- using the three dimensions of the Australian curriculum
- using assistive technologies such as captions, enhanced audio, enlarged text and images, screen readers, subtitles, tactile materials]
- analogue/traditional, physical/kinaesthetic activities
- learning activities that check students’ understanding:
- what is a story?
- what is a documentary?
- discussion about how story tellers use stimulus material in different formats and combinations of formats such as audio, visual, tactile or other multimedia formats
- places, spaces and times where students can communicate the message of their stories
- classroom organisation strategies such as:
- small groups to encourage students to take roles that suit their strengths,
- using different multimedia formats,
- supporting students to present their learning in formats that facilitate the expression of their ideas
- pre-recorded presentations.
For further information, see the Student Diversity pages on the Australian Curriculum website.
Resources
These resources may be useful when planning teaching and learning programs. ACARA advises teachers to use their own judgement about the value of the resources for their teaching context. Teachers are encouraged to use the list as a starting point to identify further resources.
- ABC education
- Media Arts resources main page – a large range of teaching resources related to The Arts, suitable for primary and secondary students
- Family life and history – resources looking at social history and mapped to the history curriculum for primary and secondary students
- Immigration – resources mapped to the Australian curriculum and suitable for primary and secondary schools
- Journalism and news reporting – resources mapped to the Australian curriculum, suitable primary and secondary schools
- Popular culture! – contains primary and secondary teaching and learning resources mapped to the Australian curriculum
- Stories! – English games, videos and teaching resources on the art of storytelling, mapped to the Australian Curriculum for primary and secondary students.
- ACMI
- Film it! – an online resource covering a range of filmmaking skills found in pre-production, production and post-production stages
- Game Builder – an online resource for teachers and students making their very first videogame, and for those who have some experience
- Getting started with the theme: TIME – another approach to exploring the theme of Time
- Resources for primary teachers
- National Film and Sound Archive of Australia – Education Resources
- Australian Screen education collection – designed to help teachers and students, includes clips accompanied by teachers’ notes created by specialist curriculum writers.
- org.au: